Chicken Posole

Posole is a classic Mexican dish that combines hominy (alkali-treated dried corn) and chicken or pork and cooks all day. In our short cut version, we will use an electric pressure cooker, an Instant Pot, to speed up the cooking time, so you can have this delicious, healthy soup anytime you feel like it!

Follow the recipe at least once, and try it as is. I promise you won’t be disappointed. I make this soup/stew dish often when the weather gets a bit chilly for me and my family.

It’s been hot one week and cold the next here in Southern California, so I make this on particularly chilly nights to enjoy after my son and husband comes home from soccer practice. I hope you enjoy this recipe as much we do!

Follow me on Facebook! https://www.facebook.com/At-Home-With-Theresa-100255438410727/

Ingredients:

2 pounds boneless, skinless chicken breasts

salt and pepper

2 tablespoons extra virgin olive oil

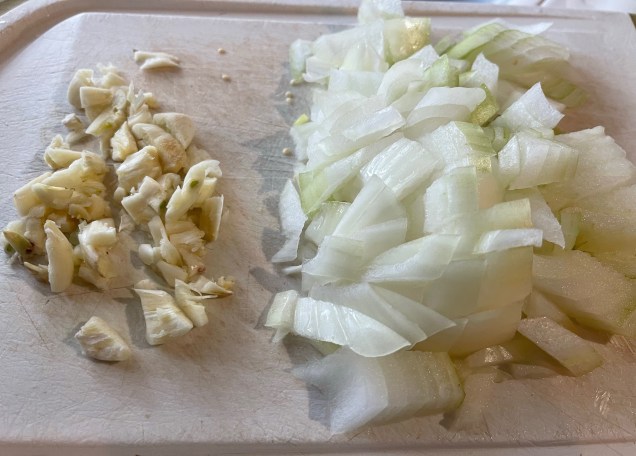
1 medium yellow onion, diced

4 garlic cloves, minced

1 small jalapeño chile, seeds removed and finely chopped

1 teaspoon dried oregano, crumbled

1 teaspoon ground cumin

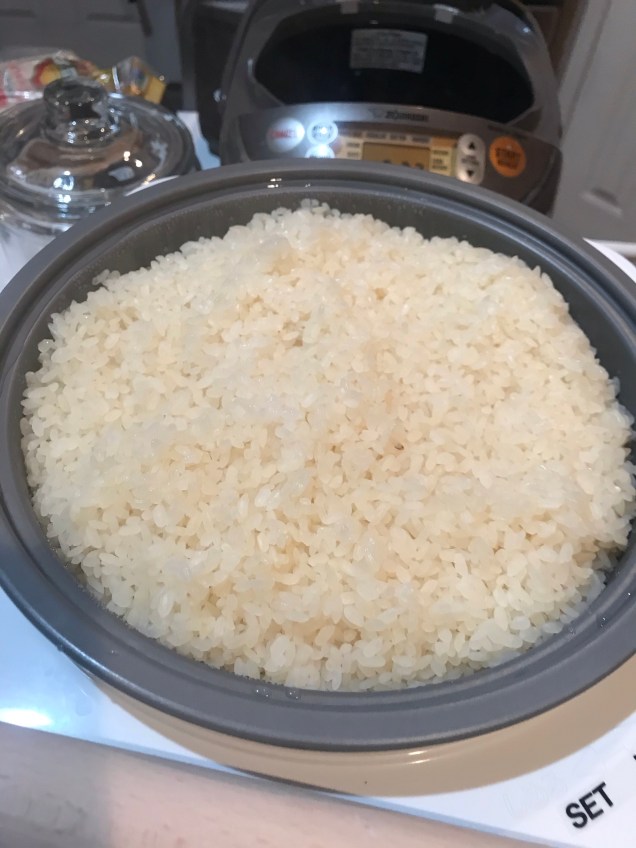
1 can (25 oz./780 g) hominy, drained and rinsed

4 cups chicken broth

6 tomatillos, husks removed, rinsed and coarsely chopped

Juice of 1 big lime

Toppings: Crumbled queso fresco, chopped fresh cilantro, avocado slices, and lime wedges

Procedure:

1. Season the chicken breasts generously on both sides with salt and pepper.

2. Set your Instant Pot to “sauté,” and drizzle in the olive oil. Sear the chicken on both sides until golden brown, about 4 – 5 minutes per side. Transfer the chicken to a dish.

3. Add the onion to the Instant Pot and cook, stirring occasionally, until tender and translucent. Add the garlic, chile, oregano, cumin, a pinch of salt and pepper and cook for a couple of minutes.

4. Add the hominy, chicken broth and tomatillos to the pot and stir to combine. Return the chicken to the pot.

5. Cover the pot with the lid, and turn the valve to “sealing.” Set it to cook at high pressure for 20 minutes.

6. When the pressure cooking is complete, turn the valve to “venting” to manually release the steam. When the steam stops, carefully remove the lid and transfer the chicken to a large bowl.

7. Shred the chicken into bite-size pieces. Return the chicken to the pot, add the lime juice and stir to mix. Adjust seasonings as needed.

8. Ladle the soup into individual bowls. Top with queso fresco, cilantro, avocado and lime wedges, and serve immediately. Serves 6 to 8.

Tomato Egg Drop Soup

I wasn’t able to take photos as I was preparing this soup since I upgraded my phone and it took forever to sync with the old one.

In the meantime, I was totally phoneless (is that even a word?). I could’ve used the big Nikon dslr but it definitely would be in my way.

This soup cooked up really fast, about 15 minutes total, so it was ready way before my phone was done. I didn’t realize I had 12,000 photos and almost as much videos in there as I take photos with the phone when trying out and testing new recipes. I need to go and delete some one day. One day….

Anyway, the recipe….this is similar to the Egg Drop Soup you’ll find in most Asian restaurants, but with the addition of tomatoes. Trust me, it is very good.

My husband really loves Egg Drop Soup and since March last year, we had not gone out to eat at all. Time to try making it at home.

Someone sent me this recipe to try and after a few tweaks, I think it’s just perfect. I added a cup of water as the chicken stock made my soup a bit too salty for my taste. You may use 6 cups of chicken stock if you prefer your soup saltier.

I only have that one photo of the soup in the serving bowl, but if I make it again, I will update with step by step photos like all of my recipes!

Enjoy and I hope you’ll like it as much as we did!

Follow me on Facebook: https://www.facebook.com/At-Home-With-Theresa-100255438410727/

Ingredients:

2 ripe tomatoes, stemmed and diced

Pinch of salt

2 tbsp vegetable oil

1 garlic clove, minced

5 cups chicken stock

1 cup water

Green onions, sliced

2 eggs, beaten

2 tbsp cornstarch mixed with 2 tbsp water

2 tbsp soy sauce

Pinch of ground pepper

Procedure:

1. Sprinkle the tomatoes with a pinch or two of salt set aside.

2. Heat the oil in a medium saucepan over high heat. Add the tomatoes and cook for a couple of minutes until it softens.

3. Stir in the garlic. Cool for a couple of minutes until fragrant.

4. Add in the the chicken stock and water, cover and bring to a boil.

5. Stir the soup clockwise. Pour the beaten eggs into the center of the pot and keep stirring clockwise.

6. Stir in the reconstituted cornstarch, soy sauce, and pepper.

7. Simmer for a couple of minutes to cook the cornstarch and thicken the soup.

8. Pour into serving bowls. Top with the spring onion before serving.

Electric Lunchbox #91: Taco Soup

Taco Soup!

Perfect for the cold weather we are having right now…not that it compares to the snow storms experienced in Texas and other states. But still, everyone needs a good recipe for a delicious warm soup, right?

This is another Brentwood recipe, one that we tasted at a potluck more than once and got the recipe to make it ourselves at home whenever we craved it. It’s got everything to make it hearty and filling yet it’s not too heavy. A perfect balance of flavor and healthy ingredients.

I like my taco soup with all the fixings…sour cream, cheese, green onions, chopped onions, tortilla chips…but it’s also delicious as is.

Hope you try this ELB version, stay warm and safe my friends!

*NOTE that this recipe uses regular sized measuring cups, NOT the tiny ELB cup, unless specified.*

Follow me for more recipes for the ELB!

See Itaki’s offerings here! https://www.itakico.com/theresa

Follow me on Facebook: https://www.facebook.com/At-Home-With-Theresa-100255438410727/

Ingredients:

1/4 cup canned Pinto beans, drained

1/4 cup canned kidney beans, drained

1/4 cup canned corn, drained

1 cup canned diced tomatoes, with liquid

1 tablespoon canned green chili

1 tablespoon taco mix powder

1 tablespoon ranch mix powder

4 oz can chicken meat, drained

1 cup water

1 1/2 teaspoons cornstarch

2 ELB cups water for the base

*Sour cream, grated cheese, chopped green onions, tortilla chips, to serve

Procedure:

1. In the big ELB bowl, place pinto beans,

2. Kidney beans,

3. Corn,

4. Tomatoes,

5. Green chili,

6. Taco powder

7. Ranch powder,

8. Water,

9. Chicken,

10. Water,

11. Cornstarch,

12. Mix everything together. Place in the ELB base. Add 2 ELB cups of water to the base. Cover and let steam until it shuts off, about 40 minutes.

13. Carefully open the ELB, and stir the soup. Taste and adjust seasoning to taste.

14. Serve hot with all the fixings! Enjoy!

Electric Lunchbox #87: Minestrone

It’s been cold this week here in Southern California so when I told my husband that I do not have any ideas on what else to make in the ELB, he said “soup!”

He went on naming different soups he grew up eating in Peru…and I stopped him when i heard Minestrone. I love Minestrone and I haven’t made it in a long time!

When I was a high school student at Herbert Hoover High in Glendale, CA, I chose a cooking/baking as my elective class. Not only as a way to nurture a life skill/hobby, but also to rest my brain between classes. And the basic Minestrone I make all these years always comes back to the recipe I learned in Mrs. Baker’s class.

So here it is! The original recipe I scribbled down when I was 15 years old – sure brings back a lot of memories! I didn’t even have to scale it down for the big ELB bowl as it fits perfectly!

Do not feel like you have to follow the recipe to the letter. Any bean or veggie you want, or have on hand, can be used instead of the ones listed in the recipe but I do encourage you to try the recipe as it is at least once. Then you can make adjustments after you’ve tried the recipe as is.

*NOTE that this recipe uses regular sized measuring cups, NOT the tiny ELB cup, unless specified.*

Follow me for more recipes for the ELB!

See Itaki’s offerings here! https://www.itakico.com/theresa

Follow me on Facebook: https://www.facebook.com/At-Home-With-Theresa-100255438410727/

Ingredients:

2 tablespoons onions

1 tablespoon butter

1 tablespoon cornstarch

2 tablespoons tomato paste

1 tablespoon rice

1 tablespoon small pasta

1 tablespoon canned beans

1/2 cup peeled and diced potatoes

1 tablespoon green peas (used celery as I was out of green peas)

Salt and pepper

A few rosemary leaves

3/4 cup beef broth

2/3 cup water

Procedure:

1. Place the chopped onions in the big ELB bowl.

2. Add the butter,

3. Cornstarch,

4. Tomato paste,

5. Rice,

6. Pasta

7. Beans,

8. Potatoes,

9. Celery or green peas

10. Add a generous pinch of salt and pepper, and the rosemary leaves,

11. Add the beef broth and water. Stir to mix everything together.

12. The butter will be a big blob but it will melt as the soup cooks the pasta and rice. It makes this soup rich and velvety!

13. Place the bowl in the ELB base. Add 3 ELB cups of water to the base, cover and let steam until it shuts off, about an hour.

14. Carefully open the ELB. Stir the soup and check the pasta and rice if it’s cooked through.

15. Serve hot! Enjoy!

Tiger Mochi Maker

One of the ladies at an ELB group I’m in mentioned a blogger making mochi like I did at the beginning of the year. Since I am making some that day, I figured I’ll just write about it too.

The holidays got a bit too busy to catch up with writing recipes (even though it was the perfect time as kitchens all over are definitely churning out yummy goodies non stop!). But I was able to snap photos (and videos!) along the way and I hope you’ll enjoy this read! Oh the beautiful chaos in the kitchen!

Mochi is traditionally eaten in Japan during New Year’s, it is added to soups like Ozoni, (made with chicken, vegetables and mochi) or Zenzai (sweet red bean soup with soft mochi pieces swimmimg around!). We also have kiri mochi, which is made from pounded sweet rice shaped into bars and dried. You toast them up till they puff and dip them in soy sauce. Yummy!! I like all those but I love stuffed mochi even more!

I had always used this brand of sweet rice so I’m not sure if there is any other brand out there. Filipino cuisine uses a sweet, sticky rice too but the appearance is different. These ones are almost round and the Filipino “malagkit” rice is more elongated. Not sure if they are interchangeable as I have both but never tried to replace one with another.

For my New Year’s mochi, I start the process a day before I want to cook and pound the rice.

I use 10 cups of rice. This is the maximum amount this mochi maker can handle and since I’ll be bringing some over to my mom, I figured I’ll just make a big batch. You HAVE to use the rice measuring cup that came with the mochi maker. Do not lose it! *If you ever lose it though, know that 1 rice measuring cup = 3/4 US standard dry measuring cup. 😉

Wash the rice thoroughly, until water runs clear. To do this, you place the measured rice in a big bowl, fill with water and run your fingers through it. I try to gently rub the grains together too. Drain and refill the bowl. Do this several times. Then fill the bowl with water one last time. Soak for at least 6 hours, ideally overnight.

After soaking, drain the rice and place in a strainer for 30 minutes. This is very important as you do not want the rice too wet which will make your mochi too soft.

Add 2 1/2 cups water in the base of the mochi maker. This amount corresponds to the amount of rice you’ll cook. There is a chart in the manual.
*Reminder that you HAVE to use the cup that came with the machine to measure both the rice and the water.*

Next, attach the mixing bowl, twisting to set it in place. Place the impeller in the bowl, turning it, until it settles in.

Carefully place the drained rice into the bowl.

Level out the top if needed.

Place the plastic cover over the bowl.

Press “steam”. It will steam until the reservoir runs out of water. When it is done, the buzzer beep loudly. Press “off”.

Remove the plastic cover, and test a grain of rice for doneness. You should be able to crush it between two fingers.

Press “pound” and start a timer. This time, you DO NOT use the cover. This step will also eliminate excess moisture as it pounds the rice, so leaving the cover off is necessary. It’ll take about 10-15 minutes. See the videos below to help you estimate the texture.

This is what the rice looks like in the beginning.

After a few minutes, a ball starts to form and the texture starts to look smoother.

In about 12 to 15 minutes, you would have a homogenous, smooth looking ball.

There should be no rice grains visible, just one smooth, white mass.

Sprinkle katakuriko (or cornstarch)on the main cover of the mochi machine or a clean board.

Carefully invert the hot mochi onto the prepared surface.

Lift the hot bowl with pot holders and gently nudge all of the delicious mochi out of the bowl. Go ahead and taste some! I pinch a few pieces here and there and fill with an. See the last photo! Work (and eat!) quickly as this mochi hardens really fast.

You can roll them in the tray, sprinkling with katakuriko or cornstarch as needed.

Or you can transfer them into 2 plastic, one gallon freezer bags, snipping both sealed ends so you can roll the mochi all the way to the corners.

Leave bag open after rolling to dry the mochi a little. I leave it for several hours, turning it over and loosening the plastic a couple of times. Then remove from bag, cut into pieces and let dry a few more hours.

Store these in the freezer as it will get moldy rather fast at room temperature.

To serve, toast the squares until puffed up and toasty. I use my toaster oven for this but a pan on the stove over low to medium heat, or even just microwaving till it puffs up, are both good too. Dip in lots of soy sauce and enjoy!

Mochi stuffed with An. 😋

Follow me on Facebook: https://www.facebook.com/At-Home-With-Theresa-100255438410727/

Electric Lunchbox #74: Pork Sinigang

Filipino hot and sour soup!

Growing up I remember our cooks boil fresh tamarind until soft and press it through a metal strainer to get the “sour” for this soup. I never had to do that as I always have this packaged “sinigang” mix to use. I think it tastes the same, plus I really do not know where to get fresh tamarind, nor do I have the time to boil and squeeze it. Convenience in semi-home made is precious in our busy lives. It gives me more time to sit and enjoy dinner with my family. ❤️

You can make this with beef too, but I happened to have pork so I used pork. You want the pork to have some fat to make the soup richer and more tasty.

Long green beans

The vegetables I used here are what I remember our soup had, and I LOVE picking out the taro (gabi)! Water spinach is rather hard to find unless I go to an Asian grocery store, and our Tita Naty used spinach when she made it one cold day in Virginia, so I used spinach. Radish, long green beans, onions, and a tomato rounds everything out perfectly. If you want, add 1 or 2 whole long green chili pepper. Do not bruise or cut it. You serve it with the soup, take it out and crush it with some fish sauce in a small saucer, then drizzle it over your soup and rice. Yum! You have yourself a delicious lunch cooked with very little effort. I hope you’ll like this dish!

*NOTE that this recipe uses regular sized measuring cups, NOT the tiny ELB cup, unless specified.*

Follow me for more recipes for the ELB!

See Itaki’s offerings here! https://www.itakico.com/theresa

Follow me on Facebook: https://www.facebook.com/At-Home-With-Theresa-100255438410727/

Ingredients:

155 grams (1/2 cup or so) cubed boneless pork

30 grams (3-4 pieces) long beans, cut into 1.5” pieces

60 grams (1-2 pieces) taro, peeled and cubed

95 grams (1/2) radish, peeled and sliced thinly

30 grams (1 small) tomato, diced

35 grams (1 tablespoon) minced onion

15 grams (a handful) spinach leaves

1 1/2 cups water

1/2 – 1 tablespoon “sinigang mix” (I used 3/4 tablespoon)

1/2 – 1 teaspoon teaspoon beef bouillon powder

3 ELB cups water for the base

Fish sauce, to serve (optional)

If serving with rice:

2 ELB cups rice, rinsed and drained

2 ELB cups water for the rice

Procedure:

1. In the large ELB bowl, place pork, long beans, taro, radish, tomato, onion, spinach , and water

2. Add the “sinigang mix”, bouillon powder, and fish sauce, if using. Stir to mix.

3. Place bowl in the ELB base. Add 3 ELB cups of water to the base.

4. If preparing with rice, wash and drain 2 ELB cups of rice and place in the small or medium ELB bowl. Add 2 ELB cups water and place on top of the big bowl if using the small bowl (or on the upper level for the medium bowl).

5. Cover the ELB and let steam until it shuts off, about 1 hour.

6. Carefully open the ELB and check the meat and rice for doneness, adding more water to steam longer if necessary.

7. Serve hot and enjoy!

Sourdough Discard: Scallion Pancakes

When you keep a sourdough pet, you tend to have a lot of discards when you need to refresh, or “feed” your sourdough before using. They’re called “discard”, but I do not discard them at all. There are a lot of different kinds of food that you can make using it. I am constantly trying new ways to incorporate them in my cooking and will be posting recipes when the experiments are successful.

This is my easiest recipe for using up those discards. It also uses a lot of it so feel free to collect them in a jar in the fridge to make enough of these pancakes to share. Honestly, I sometimes feed my sourdough a lot to be able to prepare more of this – it’s that good!

This recipe makes about 3 to 5 pancakes, depending on how small or big you make them. Feel free to double the quantities to make more.

Serve as a snack, breakfast, or a side with stir fries or braised dishes.

You’ll only need a few ingredients:

Pancakes:

1 cup discard

2 tablespoons water

1 teaspoon toasted sesame oil

1/2 teaspoon grated ginger

1/8 teaspoon baking soda

1/8 teaspoon baking powder

1/4 teaspoon salt

1/8 teaspoon pepper

Oil for frying

1 bunch scallions, sliced

1/4 cup black and white sesame seeds

Dipping sauce:

1/4 cup soy sauce

1/2 tsp sesame oil

1/2 tsp rice wine vinegar

1/2 tsp sugar

1 tsp asian chili sauce, optional

1. In a bowl, mix together discard, water, sesame oil, ginger, baking soda, baking powder, salt, and pepper.

2. Place about a teaspoon of cooking oil in a fry pan and heat over medium heat. Pour 1/4 to 1/3 cup batter in and sprinkle with sliced scallions and sesame seeds.

3. After about 2 – 3 minutes, turn the pancake over to cook the other side about 2 – 3 minutes more, until cooked through.

4. Mix the ingredients for the sauce in a small bowl. OR if you don’t want to mess with other ingredients, just plain soy sauce will do as dipping sauce. Serve with pancakes.

Follow me on Facebook: https://www.facebook.com/At-Home-With-Theresa-100255438410727/

Electric Lunchbox #42: Aloo Matar (Potatoes and Peas Curry)

We’re making Indian food today! And it’s vegetarian too!

This recipe is made from potatoes and peas, cooked in a tomato based sauce with garlic, ginger, onion, cumin, coriander, etc. then sprinkled with cilantro just before serving. Yum!

I like to cook the spices with oil on the stove to release all the lovely aromas, caramelize the onion, and take the edge off the garlic and ginger. I think this little extra step will give you a more flavorful dish than my usual “place everything in the bowl and cook” recipes. Specially since this is a vegetarian dish, I definitely encourage you to follow this step.

After sautéing the spices, you can cool and add them to the bowl and take it to work if you’re cooking at work. Otherwise, do as I did and just add it to the prepared vegetables in the bowl and cook. It will taste amazing, I promise!

*NOTE that this recipe uses regular sized measuring cups, NOT the tiny Itaki cup, unless specified.*

Follow me for more recipes for the Itaki! See Itaki’s offerings here! https://www.itakico.com/

I only had seeds, so I had to crush it first.

1 tablespoon oil

1 teaspoon coriander

1/2 teaspoon cumin

1/2 teaspoon paprika

1/4 teaspoon garam masala

1/4 teaspoon turmeric

1/2 teaspoon minced ginger

1 small onion, peeled and diced

1/2 teaspoon minced garlic

1 potato, peeled and diced

1/2 cup peas

2 tablespoons tomato paste

1/4 teaspoon salt

1 cup water

120 ml (3 little cups) of water for the base

Chopped cilantro, to serve

*An optional step is to combine the spices and salt in a food processor and whirl until it becomes powdery. I only had whole coriander seeds, so I crushed it then run it through the food processor with the other spices to blend. *

1. Heat a pan over medium low heat. Add oil, then add coriander, cumin, paprika, garam masala, turmeric, and ginger. Stir until fragrant. Add onions and garlic. Sauté until wilted and slightly browned. Set aside. *You can leave it in the refrigerator at this stage and add the potatoes, peas, and water when ready to cook.*

2. Place potatoes and peas in the big bottom bowl of the electric lunchbox. Pour the sautéed mixture over and add tomato paste and salt.

3. When ready to cook, pour 1 cup water in the bowl and stir everything together until the tomato paste dissolves.

4. Place the bowl in the base of the electric lunchbox and add 120 ml water to the base. Cover and let steam until done, about 55 minutes.

5. Carefully open the lunchbox and check the potatoes for doneness, it should be tender yet not falling apart.

6. Sprinkle with cilantro and serve with rice, or flat bread.

5. Enjoy!

Follow me on Facebook: https://www.facebook.com/At-Home-With-Theresa-100255438410727/