Spicy Eggplant

Spicy Eggplant…this is one of my favorite dishes to order when eating out at an Asian restaurant. Of course with COVID-19 I had been cooking almost all of our meals at home for over a year.

Most of the meals I like to eat are easily made at home so I just had to recreate this recipe too as I have been craving spicy, salty, sweet foods lately. Must be because we are in this pandemic longer than anyone thought we would. This dish checks all the boxes – spicy, sweet, and salty – truly delicious with plain steamed rice. As a bonus, you get your veggie serving in there too!

You can make this vegetarian by cooking it as it is but my boys like meat and frowns if they cannot find meat in their plate so I did add a couple of handfuls of chopped meat in there. You can also make it spicier buy adding more chili paste. As always, feel free to tailor my recipes to your tastes!

Follow me on Facebook: https://www.facebook.com/At-Home-With-Theresa-100255438410727/

For the Sauce:
2 tablespoons oyster sauce
2 tablespoons soy sauce
2 tablespoons water
1 tablespoon plain white vinegar
1 tablespoon brown sugar
1 teaspoon chili paste (sambal oelek)
1/2 teaspoon ground bean sauce (or hoisin sauce)
1/2 teaspoon sesame oil

To finish cooking:
1 tablespoon canola oil
1 pound eggplant, peeled, cut into 1-inch cubes
1 teaspoon garlic, minced
1 tablespoon cornstarch
2 tablespoons water

*I added about 200 grams chopped pork to this recipe when I was taking photos of it for this article. You can leave it out if you want, but it sure makes it taste better!*

1. Prepare the sauce by combining all the ingredients in a small bowl and mixing well. Set aside.

2. Heat oil in a wok to 350 degrees F.

3. Add the diced eggplant and cook, stirring once, for about one minute. Remove the eggplant with a slotted spoon and set on paper toweling to drain.

4. Remove all but about a teaspoon of oil from the wok. Turn the heat to high and add the garlic.

5. Add the chopped pork and let it brown for a few minutes.

6. Carefully pour in the sauce.

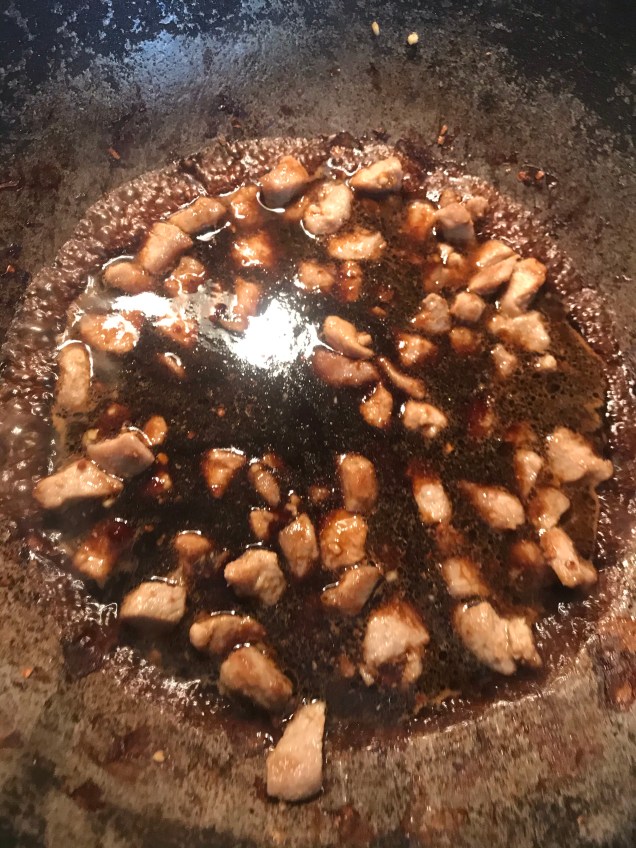
7. Let the sauce come to a simmer for 30 seconds.

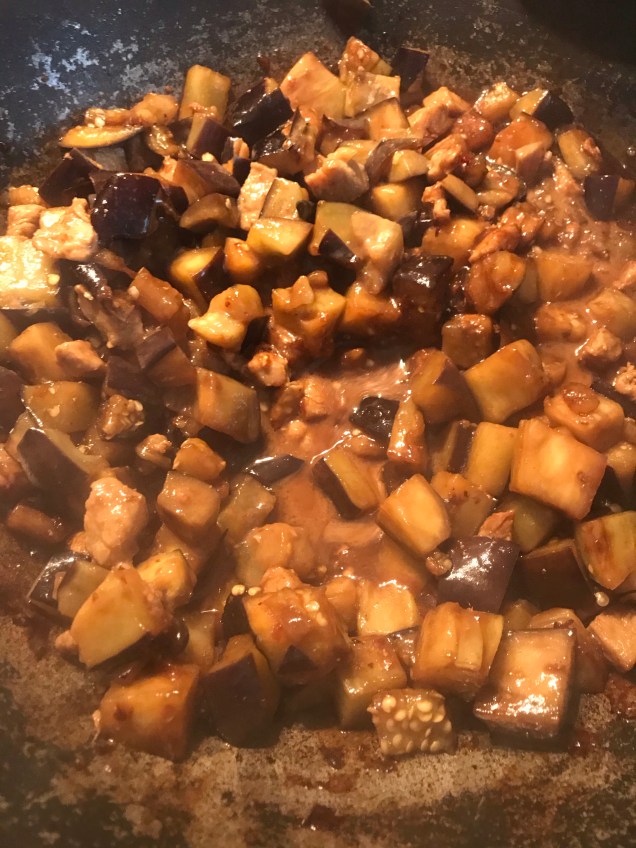
8. Add the eggplant back to the wok and cook for 10-15 seconds while stirring.

9. Combine the cornstarch,

10. and water to make a smooth paste.

11. Stir it into the eggplant mixture.

12. Keep stirring until it thickens.

13. Let it come to a boil and simmer for 2-3 minutes.

14. Serve hot with lots of steamed white rice.

15. Enjoy!

Tomato Egg Drop Soup

I wasn’t able to take photos as I was preparing this soup since I upgraded my phone and it took forever to sync with the old one.

In the meantime, I was totally phoneless (is that even a word?). I could’ve used the big Nikon dslr but it definitely would be in my way.

This soup cooked up really fast, about 15 minutes total, so it was ready way before my phone was done. I didn’t realize I had 12,000 photos and almost as much videos in there as I take photos with the phone when trying out and testing new recipes. I need to go and delete some one day. One day….

Anyway, the recipe….this is similar to the Egg Drop Soup you’ll find in most Asian restaurants, but with the addition of tomatoes. Trust me, it is very good.

My husband really loves Egg Drop Soup and since March last year, we had not gone out to eat at all. Time to try making it at home.

Someone sent me this recipe to try and after a few tweaks, I think it’s just perfect. I added a cup of water as the chicken stock made my soup a bit too salty for my taste. You may use 6 cups of chicken stock if you prefer your soup saltier.

I only have that one photo of the soup in the serving bowl, but if I make it again, I will update with step by step photos like all of my recipes!

Enjoy and I hope you’ll like it as much as we did!

Follow me on Facebook: https://www.facebook.com/At-Home-With-Theresa-100255438410727/

Ingredients:

2 ripe tomatoes, stemmed and diced

Pinch of salt

2 tbsp vegetable oil

1 garlic clove, minced

5 cups chicken stock

1 cup water

Green onions, sliced

2 eggs, beaten

2 tbsp cornstarch mixed with 2 tbsp water

2 tbsp soy sauce

Pinch of ground pepper

Procedure:

1. Sprinkle the tomatoes with a pinch or two of salt set aside.

2. Heat the oil in a medium saucepan over high heat. Add the tomatoes and cook for a couple of minutes until it softens.

3. Stir in the garlic. Cool for a couple of minutes until fragrant.

4. Add in the the chicken stock and water, cover and bring to a boil.

5. Stir the soup clockwise. Pour the beaten eggs into the center of the pot and keep stirring clockwise.

6. Stir in the reconstituted cornstarch, soy sauce, and pepper.

7. Simmer for a couple of minutes to cook the cornstarch and thicken the soup.

8. Pour into serving bowls. Top with the spring onion before serving.

Electric Lunchbox #85: Bodega Beans

I read an article about Bodega Beans a few weeks ago. Have you heard of it? It sounded quite delicious to me that I was planning to make it even before I was done reading the article.

Apparently it is a recipe for when you want a cheap but healthy meal with readily accessible ingredients. And nowadays, who doesn’t want that? It can be a wonderful side dish, if anything!

According to the article, the most basic “recipe” is to sauté garlic and onions in a little olive oil, add a can of drained beans and any seasoning you like, drizzle with more olive oil and you’re done! A sprinkle of cheese is optional, then serve with rice or bread.

I did make it and it was absolutely delicious! I added a few spices to it but feel free to use any that you like or have!

After making it a few times on the stove, I made it in the ELB for you guys! You can prepare rice in the small nesting bowl and you’re all set for a yummy meal!

*NOTE that this recipe uses regular sized measuring cups, NOT the tiny ELB cup, unless specified.*

Follow me for more recipes for the ELB!

See Itaki’s offerings here! https://www.itakico.com/theresa

Follow me on Facebook: https://www.facebook.com/At-Home-With-Theresa-100255438410727/

I like to add crispy bacon to my bodega beans as my son doesn’t like beans but loves bacon…so beans with bacon is acceptable to him. 😊

Just place the bacon strips in a clean skillet, let the oil render out and brown till crisp. Crumble when cool.

Ingredients:

Bacon, browned and drained, optional but highly recommended

1 tablespoon minced onions

2 tablespoons chopped carrots

1 teaspoon garlic powder

1/2 teaspoon salt

1/4 teaspoon ground black pepper

Cumin, paprika, sazon todo, as desired

1 tablespoon chopped celery

1 can beans, rinsed and drained (garbanzo, pinto, red bean, black bean, any will do)

2 tablespoons olive oil or 1 tablespoon each bacon grease and olive oil, more as needed

Parmesan cheese, optional

Avocado slices, optional

Chopped cilantro, optional

Chili pepper flakes, optional

Procedure:

1. Place onions in the big ELB bowl.

2. Add some carrots,

3. Salt, pepper, garlic powder and any other seasoning you like. I love adding a couple of shakes of cumin.

4. Chopped celery,

5. The can of drained beans,

6. Crumbled cooked bacon,

7. Mix everything together. Add the olive oil or bacon grease and olive oil mix. Cover the bowl with foil and place in the ELB base.

* you can place 2 ELB cups of rice, rinsed and drained with 2 ELB cups water to the little nesting bowl to round out your meal!*

8. Add 3 ELB cups of water to the base, cover and let steam until it shuts off, about an hour.

9. Carefully open the ELB and mix the contents. Serve hot with rice, bread, cheese, chopped cilantro, and/or avocado if desired. Sprinkle with chili pepper flakes if you want a little spice.

10. Enjoy!

Giniling (Ground Meat With Potatoes, Carrots, And Green Peas)

This is one of those recipes that every family in the Philippines has a unique version of. This particular one is my own version put together with memories of eating it in Bataan as a kid in our aunt’s home, the bakery that used it to stuff pandesal (bread buns) with, and all other places I’ve had it, including the different variations our cooks had when making it over the years at our own home.

I put everything I remember it had together with the quail eggs, if I have it on hand. Otherwise I usually add hard boiled chicken eggs.

This version has tomato sauce instead of a pound of fresh tomatoes as it is easier to make it this way year round.

If I have it, I also add diced bell peppers. Adding both green and red bell peppers also add to the many color of this dish.

Feel free to add more or less of a particular ingredient, remove one that you do not like, and make it your own.

1 pound ground beef (or pork)

1/2 cup to 1 cup water

2 tablespoons oil

1 tablespoon minced garlic

1 onion, chopped

1 can (8oz) tomato sauce

1/4 cup soysauce

1 large potato, peeled and cubed

1 large carrot, peeled and cubed

1/2 cup raisins

1/2 cup green peas

1/2 cup corn

1 tablespoon beef bouillon powder

2 cups water

2 tablespoons fish sauce

1/2 teaspoon ground black pepper

Canned quail eggs or boiled eggs, optional

1. Place ground beef in a saucepan or wok with a 1/2 cup to 1 cup water and set over medium high heat. Let it boil the water off and brown the meat.

2. Move the meat to one side of the pan and add the oil. Let it heat up a little then add the garlic. Stir until fragrant then add the onions. Saute until wilted and lightly browned.

3. Add the tomato sauce, soy sauce, potatoes, carrots, raisins, green peas, corn, bouillon powder, water, fish sauce, and pepper. Mix everything together, cover and simmer over medium low heat until potatoes and carrots are done, around 20 minutes.

4. If using boiled eggs, add it now and simmer for another 5 minutes to heat it up. Taste and adjust seasoning to taste.

5. Serve over hot cooked rice. Enjoy!

Follow me on Facebook: https://www.facebook.com/At-Home-With-Theresa-100255438410727/

Itaki Shabuki Pot

When I got the Itaki Pro, I also got the Shabuki pot and the Itaki Jumbo. For this article, I will focus on the Shabuki pot. I purchased the optional steamer basket as I think it will be useful to cook or heat other items while your main dish is going. It kind of reminds me of my small 3 cup Aroma rice cooker with steamer!

The photo above shows everything I got in the box: the shabuki pot with a glass cover, power cord, a little instruction booklet, a soup spoon, the carry bag, and the optional steamer.

The shabuki is essentially a portable, personal sized pot and stove. You have two temperature settings, low and high, like the little stoves. The cooking surface is metal and fused to the outer plastic body. It comes with a sturdy handle, making it look like a giant soup mug. It’s just so cute!

The optional steamer is to be placed on top of the pot and the glass cover over it if cooking multiple items. The steamer can reheat food, steam veggies, or cook rice in a small pot while you cook another dish below. I think it was worth to get it even if it had to be purchased separately.

Of course, if you only have the pot itself, you can place a basket steamer (the ones that open and expand) over the shabuki and have the same effect although the depth might be different.

One piece stainless cooking surface.

The inside of the Shabuki is stainless and there are no creases to worry about, making clean up easy. I would have preferred a removable cooking bowl to make washing up easier since you have to be careful not to wet the area where the power cord plugs in.

Unlike the Itaki Pro and Jumbo, this requires you to be around and will not shut off on it’s own. You also have to be occasionally stirring your food if you don’t want it stuck on the bottom. Quick stir fries and stews would be great in the Shabuki. Ramen and other soups would be a natural food item to cook in this as is boiling water. I have not really made recipes to cook in it as any stove top recipe can be cooked in the Shabuki, just on a smaller scale.

All in all, this would be perfect for if you have limited space (dorm or studio apartments) are cooking for one, traveling, or don’t want multiple dishes to wash as you can eat straight from the pot too.

Snug fit in the carry bag because of the handle.
Does not fit with the steamer attached.

Follow me for more recipes for the Itaki!

See Itaki’s offerings here! https://www.itakico.com/theresa