Missing our travels, but stayed in last year due to COVID-19. Sharing some photos of Bellagio Las Vegas’ Christmas decor 2019.
We went right after Christmas but left on the 31st….yes, got stuck when they closed the 15 due to snow storms! Our usual 4 hour drive to Las Vegas took us almost 11 hours that day! We passed through Palm Springs, Indio, and lots of places we never had been to before.
There was an actual snow storm as we were driving through the desert. Yes I thought it was dangerous but it was also quite magical.
Good thing we chose to go around than through the mountains as we do not have chains.
A memorable time, even though our butts hurt when we finally got to the hotel. 😊
*Please note that the word “cup” in any of my electric lunchbox recipe refers to the little itaki cup included with the lunchbox. It holds 40ml.*
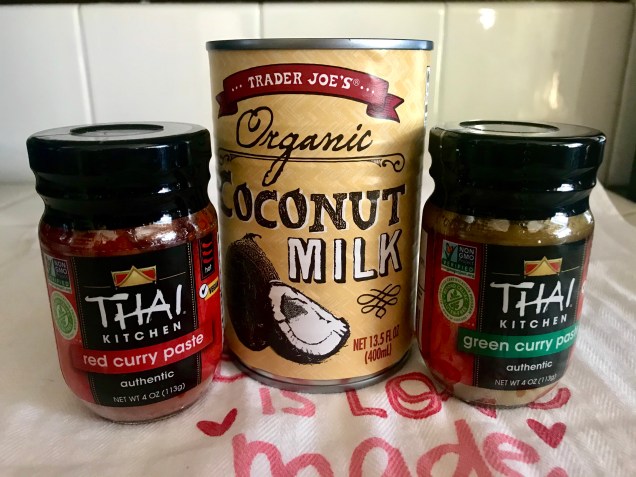
I finally found Thai curry pastes in Walmart Neighborhood Store last week after I had to make my own (with missing ingredients!) green curry paste because I wanted green curry so bad. I got both the green and the red pastes to try. Some of the highly rated ones has shrimp paste in it and since I am allergic to shrimp, I’m glad the only brand available here, Thai Kitchen, is vegan. 🤗
Let the testing begin! I also picked up some coconut milk from Trader Joes. I see lots of curry in my future! ❤️
In the bottom bowl, place the following ingredients:
Beef, cut into small cubes (you can use any meat/tofu if you prefer)
Carrots, small half moons
Potatoes, small cubes
Onions, chopped
Mushrooms, sliced
Green beans, cut into inch long pieces
1-3 tablespoon thai red curry paste(adjust to taste)
3 itaki cups coconut milk
Upper bowl:
2 cups basmati, rinsed and drained
2 cups water
Plus:
3 itaki cups water in base (about 1 hour and 15 minutes steaming time)
The curry was delicious! The bottle has a 3 chili rating for spiciness, but it is not spicy for me, which is good as I want my son to be able to eat the same dish I cook. This test batch in the Itaki is all mine, though.
Love the fact that I can test recipes using this little lunchbox and make just enough for 1 meal. If I love it, I can scale up the recipe. If I do not like it, it’s just 1 meal. This dish is a keeper though! Hope you’ll try it and share if you liked it or not!
I have been playing with my electric lunchbox at home, sneaking in every opportunity to make something yummy with almost no effort. I’ve been making curries and soups as they are easy to put together quickly and most people like it.
I posted this recipe on Itaki and Electric lunchbox Facebook groups. It got several likes and people even made it following the steps I shared. So I am sharing it here as some of my friends do not have a Facebook account (😱)
My type A personality kicked into high gear and I am constantly thinking up recipes to cook in the lunchbox. However, with the pandemic, ingredients are limited and the lines to the grocery stores are long. I will try my best to develop more recipes though as I love it when others learn something from my posts!
In case you have one of these at home, try this recipe that will reward you with a nice, hot meal in about an hour or so. All you need to do is gather the ingredients, dice it, and place them in the lunchbox bowls. Be careful not to overfill the bottom bowl though as you’ll need some space (1 inch at least!) for the smaller top bowl to nest IF you are using it. I got carried away on multiple occasions and had to go and remove some ingredients so that my food will all fit. I know I tried to get more in as this recipe easy and really good!
*Please note that the word “cup” in any of my electric lunchbox recipe refers to the little itaki cup included with the lunchbox. It holds 40ml.*
For the big, bottom bowl:
1/2 Zucchini, sliced in half lengthwise, then in half moons
1 Potato, peeled and diced into 1/2 inch cubes
Onion, diced (about 1 tablespoon)
Carrot, peeled and diced
Chicken breast, cut into cubes
3 itaki cups coconut milk (120ml)
2 tablespoon homemade or store bought green curry paste
For the smaller bowl:
2 cups basmati rice, rinsed and drained
2 cups water in the bowl with rice
3 cups water in the base
Place all ingredients FOR THE BIG BOTTOM BOWL in the bowl and mix. Place it on the base.
In the smaller, stainless bowl, place the rinsed and drained rice and the 2 cups water. Carefully place over the bigger bowl in the base.
Pour 3 cups water in the base and place the cover over everything and snap the clips in place.
Let it steam until the light turns off. Try not to peek as it will delay the cooking of the meal. Everytime you open the lunchbox, you are adding more time for your lunch to cook as it loses heat and steam.
*Please note that the word “cup” in any of my electric lunchbox recipe refers to the little itaki cup included with the lunchbox. It holds 40ml.*
Chicken Sopas, literally Chicken soup, is a Filipino version of the familiar food we serve to someone who is feeling under the weather. Or just when the weather is chilly. I think almost every country has a variation of this comforting soup, but this version has evaporated milk mixed in to make it richer and even more nutritious. If you want just a regular Chicken Noodle soup, you can definitely omit the evaporated milk. I encourage you to try it with the milk at least once though. It might just permanently change the way you make this soup!
Equally delicious!
In the big bottom bowl, add:
1-2 cups ditalini or elbow pasta (I like pasta so I used 2 cups!)
Diced carrots
Diced onions
Diced celery
3 Green beans cut into 1/4 inch lengths
Cabbage
Shredded boiled chicken
A pinch of ground black pepper
Chicken broth to cover (leave 1 inch space from the level of the water to the top of the bowl)
2 cups water in the base
In the top bowl, place:
1-2 eggs
When the lunchbox shuts off (about 50 minutes), add the 2 cups evaporated milk to the soup and stir. This is what makes it the Filipino version. If you like, you can leave the milk out.
Peel eggs and slice in half. Place on top of soup. Serve hot!
Note that the ingredients I used here were what I had on hand at the moment. You can also add hotdogs, green peas, ham, sausages, chicken…liver…anything you like!
I didn’t realize that a lot of people have this Electric Lunchbox. It was an impulse purchase for me because it was so cute! I mean, just look at it! 😍
One thing I know is that it took a little trial and error for me to be comfortable using it. The instructions included were a little vague. But I like challenges, so I dove right in!
Little experiments followed…(something I like to do as I am a scientist by profession) until eggs, soups, curry, and white rice were cooked just the way I like it. Records were kept, timers were used, and after all that, I just had to share it with others so that my findings won’t be in vain. 😊
Here are a few things I learned after tinkering with this lunchbox for a few weeks. Hoping to help others gain confidence in trying their own recipes in it.
1. *Please note that the word “cup” in my electric lunchbox recipes mostly refer to the little itaki cup included with the lunchbox. It holds 40ml.* This cup also has a handy egg piercer right on the bottom of it. Careful – as it is a bit sharp.
**I recently changed this to “uses regular cups, unless stated” since I’ve been making more than just main dishes in it.
2. Have a “prep day”. Set aside an few minutes or so to cut up meats and veggies and bag them individually in little portions. This would be easier done right after purchasing groceries. They can then be stored in the freezer for longer storage or in the refrigerator if you’d use them up soon. Frozen food can be moved to the refrigerator to defrost the night before you need it.
3. White rice always cooks perfectly when I use an equal amount of water in the rice bowl (usually 2:2) and at least 2 cups water in the base. Make sure to rinse the rice and drain before adding the measured water. You don’t have to drain every last drop, it’s quite forgiving.
4. Simmer sauces. There is an abundance of simmer sauces available in the grocery stores right now and most that I had tried were good. Just place your meat, tofu, and/or veggies in the bowl, top with a generous pour of the simmer sauce and you’re good to go! Salsa verde with chicken is great too!
5. Curry pastes and coconut milk. My favorite combo! Top any meat, tofu, and vegetables with a couple of spoonfuls of curry paste and 2-3 little cups coconut milk (basmati rice in top bowl!) and you’ve got yourself a delicious meal! Thai Kitchen brand tastes great!
6. Japanese Curry Mixes. These were the ones I experimented with in the beginning as I am very familiar with it. So easy! Add cut up chicken, pork, or beef in the big bowl. Then diced potatoes, carrots, and onions, one square(cube) of curry mix, 2 little cups of water. Place 2 little cups rice with 2 little cups water in the small bowl. Add 2 little cups water to the base, place big and small bowl in base. Cover and steam until it shuts off. Stir curry and serve over rice. Yummy!!
7. Barbecue sauce. Easy to make barbecue chicken when you have this on hand! Just add diced chicken breasts in the bowl and a good squeeze of barbecue sauce.
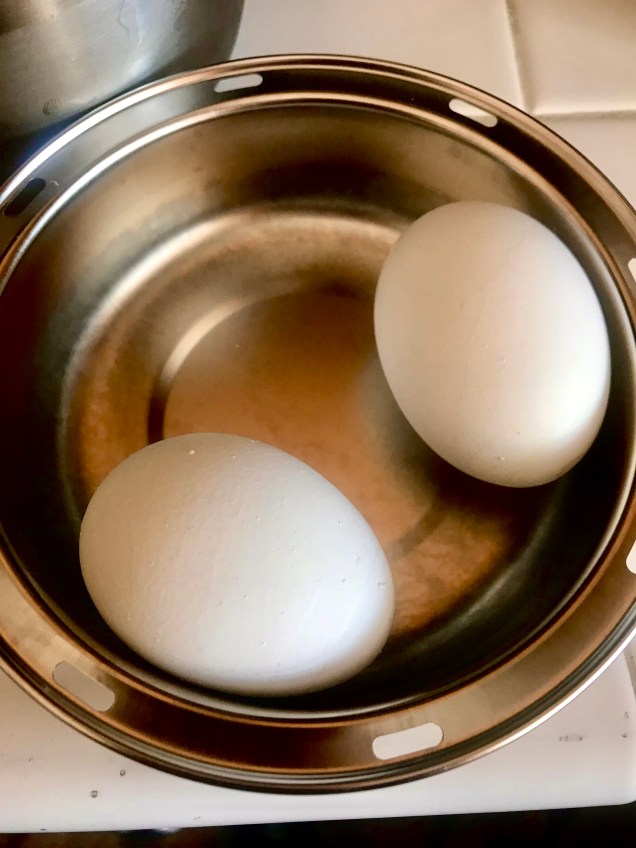
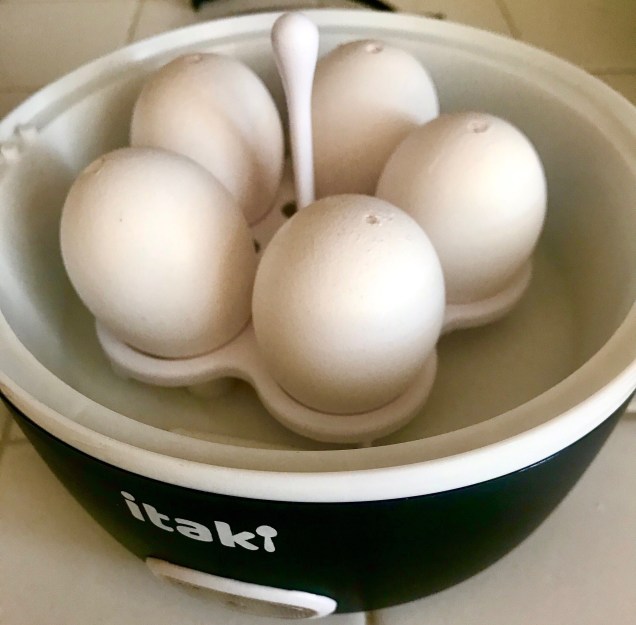
8. Boiled Eggs: I get the perfect hard boiled eggs by piercing the wide end of 5 eggs with the egg piercer (it’s on the bottom of the measuring cup), placing it in the egg holder, pierced side up and onto the base without the stainless bowls. Add 1 little cup water to the base, cover, and let it steam until it shuts off. It will take about 25 minutes. Place eggs in cold water right after cooking.
Hard boiled eggSoft boiled egg
9. Soft boiled Eggs: Take 5 eggs and pierce the wide end. Place in the egg holder and onto the base without the stainless bowls. Add 25 ml water to the base, cover, and let it steam until it shuts off. Place eggs in cold water right after cooking. This will take about 15-16 minutes. If you want the yolks runnier, use less water which equates to less cooking time.
So easy to peel!
10. To peel boiled eggs easily: Tap eggs on the counter multiple times then gently roll between your palm and the counter, exerting gentle pressure. It will peel off like the photo above.
11. Scrambled Eggs: Spray the bowl with cooking spray to make sure egg doesn’t stick. Lining with parchment works too! Cover bowl with foil. 1 little cup water in the base will be enough to cook 2 scrambled eggs in the small bowl.
12. Omelets: place diced mushrooms, bell peppers, chopped ham, turkey, cheese, spinach – whatever you use in your omelet – in the bowl that was sprayed with cooking spray. Beat 2 eggs and season with salt and pepper. Pour over everything in the bowl. Cover bowl with foil. 1-2 little cups of water in the bowl will cook the omelet, depending on how much filling was added.
13. DO NOT use the plastic lid for the stainless bowls WHILE steaming. They are perfect for storing your prepped bowls in the fridge, or for transporting the bowls to your workplace but they must be removed before turning the lunchbox on. Also, you can order extra bowls from the website if you need them to prepare meals in advance.
14. To cook small pasta (macaroni, ditalini, small penne, etc.) in soups, add 1-2 little cups pasta and pour in whatever liquid you are using, leaving about an inch between the liquid level and top of the bowl. 2 cups water in the base would be enough to cook the pasta.
15. 1 little cup (40ml) water in the base creates steam that lasts about 25 minutes in MY Itaki Pro. 2 cups is enough to cook rice, and 2-3 cups is enough to cook main dishes with raw meat (cut into small pieces) with rice in the small bowl. So far, I never had to use more than 3 cups except for one instance I’ll explain next. * Please note that I was informed that it varies from 15-25 minutes for others so please check yours out so you can estimate a baseline time per cup and go from there. I will time my cooking and add times to the recipe so you can adjust the amount of water you use in your base.*
16. Try not to open the Electric Lunchbox while it is steaming. I did it once and it took a lot longer to cook the food and I had to add another cup of water.
17. Use a scrubbing pad to remove deposits from the steamer. I had also used Magic Eraser with the same results. I will likely try vinegar soon and update this post.
*So I did try vinegar and here is the best way I found: after your food is cooked and while the steaming element is still HOT, add a little vinegar to it. Let sit for a few seconds and brush with a toothbrush until all the deposits/stains are removed. Rinse thoroughly. It will look brand new! Do not leave the vinegar too long as it may pit the metal.
18. Make sure to empty the base of residual water and let dry before storing. You do not want mold or bacteria growing in there. I just rinse and wipe them and place the base and cover upside down to dry on the counter.
19. If you want to keep condensation out of your food, line the inside of the foil with paper towel, it will absorb condensation and will help keep your food dry. I usually do this for cheesecake, scrambled eggs, or cakes.
I will add to this list as I find more useful tips. In the meantime, I will be trying to find time to cook in it more and share the recipes with you. Keep safe everyone!
I kept seeing the ad for this electric lunchbox on Facebook and other social media sites and it honestly piqued my interest.
I really do not need this lunchbox as I cannot use it at work, but can you see how cute it is? I couldn’t resist buying it (and a shabuki and the jumbo! 🤗). Since it came from overseas, it took a full month to get here. The first shipment got lost so i ordered again through their affiliate, wowzone.
Everything that came in the Itaki Pro box.
The box for Itaki Pro included the following:
A base – where you put water to steam your food.
A cover – to keep the steam/heat in.
2 stainless steel bowls that nest. Smaller one goes on top of the bigger bowl.
A plastic lid for the bowls. You do NOT use this when steaming.
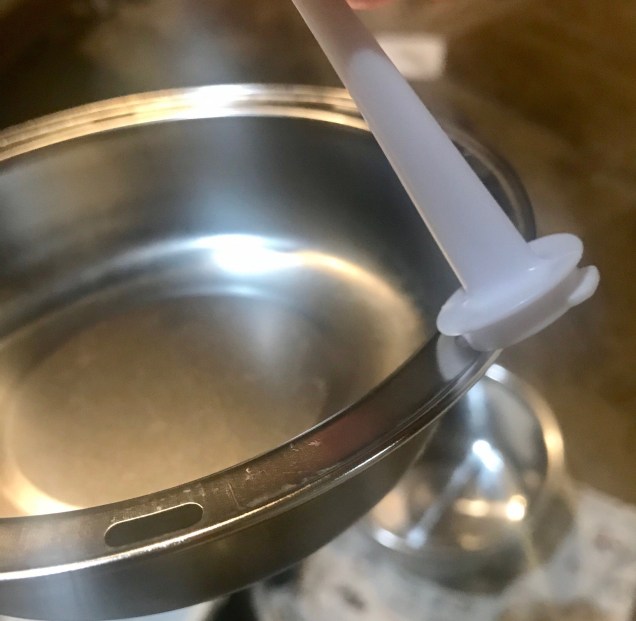
Measuring cup/egg piercer
A small measuring cup – 40 ml. This cup also has an egg piercer at the bottom. It is used to carefully pierce the wide end of an egg prior to steaming. This makes the eggs easier to peel and I heard that it reduces the eggy smell too.
Egg holder with a handle – can cook 5 eggs at a time. *The handle can be used to carefully lift the little metal bowl off of the bottom bowl! Make sure it isn’t too heavy as the handle is made of plastic.*
Recipes and instructions included
A little recipe guide and an instruction leaflet. The recipe book is also available by email in pdf format, just ask! 😊
A pretty cloth carry bag.
And the plug.
So what does this thing do? It can either cook your meal from scratch or just reheat your food using steam. It comes with a tiny measuring cup that holds 40 ml. One little cup of water in the base unit of MY itaki creates steam for about 25 minutes. (Please note that I was informed that it varies from 15-25 minutes for others so please check yours out so you can estimate a baseline time per cup and go from there. I will time my cooking and add times to the recipe so you can adjust the amount of water you use in your base.) I use 2-3 cups when cooking a full meal with raw meats specially if the bottom bowl is full. After the water has boiled off, the lunchbox automatically shuts off, convenient right? Hands free and fool proof! What’s not to love?
*Please note that the word “cup” in any of my electric lunchbox recipe refers to the little itaki cup included with the lunchbox. It holds 40ml. See photo above.*
The little stainless top bowl usually makes rice for me. I find that 2 little cups of rice, rinsed well, plus 2 little cups of water always yields perfect rice with at least 2 itaki cups water in the base. I had tried it with long grain, Japanese short/medium grain, and basmati rice. 2:2 works wonderfully for all of these. I have yet to try brown rice but will sometime.
I have been so excited waiting for this to arrive that I opened it right away and washed everything. As soon as it was clean, I checked what ingredients I have on hand to put it to the test. I feel like a kid with a new toy!
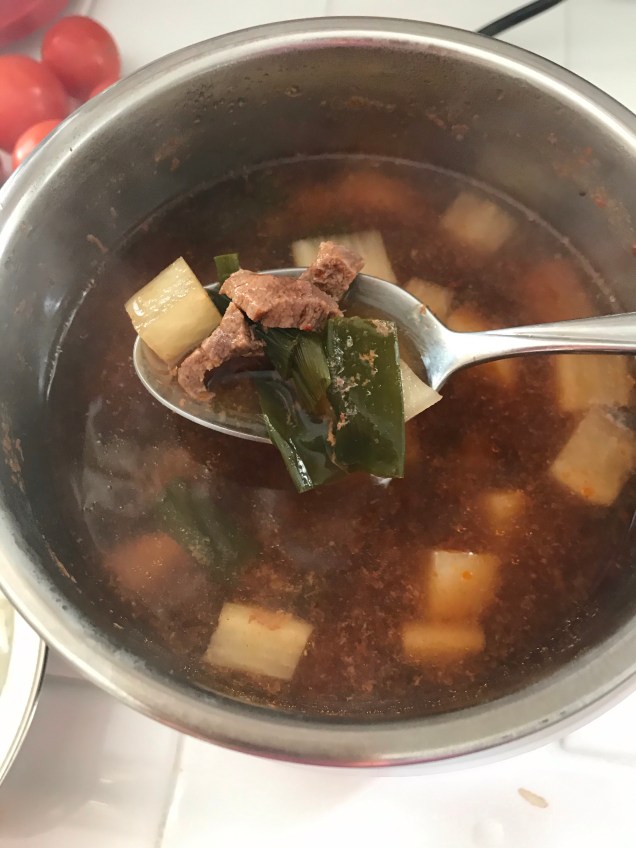
For my trial recipe I made a beef and radish soup in the bottom bowl and some rice in the top bowl.
Yum!
2 itaki cups rice, rinsed
2 itaki cups water for rice
A handful of thinly sliced beef
4 inch daikon radish, peeled and cubed
Dash of garlic powder
Minced onion
Green onions
1 1/2-2 tablespoons soy sauce
1 teaspoon fish sauce
1/2 tablespoon Korean red pepper paste (adjust to taste)
1/2 teaspoon Korean chili flakes
Water to cover
2 itaki cups water for base
Place rice in the small top bowl and rinse a few times until water is clear. Drain. Place 2 cups of water in the bowl and set aside.
In the bigger bottom bowl, place beef, radish, garlic powder, onion, green onions, soy sauce, fish sauce, red pepper paste, chili flakes, and just enough water to cover. *adjust spices to your taste.*
Add 2 cups of water in the base of the lunchbox. Gently place the big bowl in then place the small rice bowl on top. Cover, secure the clips, plug the cord, and press the button to start.
Try not to open the lunchbox until the light goes off. 2 cups of water in the base will take about 50 minutes.
When the light goes off, carefully open the clips and lift the handles. Holding the handles, turn the cover AWAY from you as the steam can burn you. You don’t want that to happen as you want to enjoy your hot meal, right? Now use a fork to gently lift the rice bowl from the lunchbox using the holes on the edges of the bowl. Fluff the rice a little. Carefully lift the hot soup out of the base and enjoy!
Rice is fully cooked and really good!Meat is done.
The beef is thinly sliced and perfectly cooked just like the rice. It took about an hour more or less but I am quite impressed as it was really good. Spicy hot and hot. The rice tames it just a little.
Can’t wait till I get more groceries and time to play with this but as of now I can truly see how useful this will be if you’re cooking for one, are traveling, in a dorm, or just want to try out a dish so you’re not stuck with a lot if you didn’t like it. Definitely worth the price and time spent waiting(about a month)!
Today was a perfect day to be outdoors so my son and I filled our water bottles and went to ride our bikes. O’Neill park is nearby and provides easy, paved roads if we want an easy ride, or difficult, unpaved inclining trails if we’d rather suffer. 😊
We chose a mix of easy and some challenging road for our 1 hour plus ride.
We stopped by the play ground and noticed that the Nature/Interpretive Center was open. We frequent this place but never saw the exhibit open.
It’s small but it provided lots of things kids and adults can learn from and some activities for kids too.
It is one of the fruits that, to me, embodies SUMMER (along with my other summer favorite, blueberries). And now that Summer 2019 is coming to an end (my son went back to school today, 5th grade!) I’d like to share an easy Peach Pie recipe with you.
You could use store bought dough for the crust but making it is easy if you have a few minutes to spare.
I recommend using peaches that are somewhat soft when you press them and those that have their “shoulders” wrinkled slightly and “dropped” already. They are the most flavorful ones, plus, they peel easily.
Roll out the bigger crust to fit the bottom of a 9” pie plate
This crust recipe comes together really fast as I use the Thermomix, however the procedure on how to make it without the Thermomix follows.
Ingredients for 2 crusts:
11 oz all purpose flour
5 oz cold butter, cut into pieces
1 teaspoon salt
4 oz ice cold water
Procedure:
Place all ingredients into the Thermomix bowl and mix 20 seconds, speed 4.
*To make the crust without the Thermomix: Place flour, butter, and salt in a bowl and pinch together with your fingers until the mixture looks like sand. Add cold water and stir with a wooden spoon until dough comes together.*
Remove dough from the bowl, divide into 2 (one slightly larger than the other) and press gently into 2 disks.
Roll the bigger disk to fit the bottom of a pie plate. Press crust onto the pie plate, allowing a little bit to hang over the edges. Prick a few times with a fork. Cover with plastic wrap.
Roll the smaller one to a 10 inch round and wrap with plastic wrap. Refrigerate both while we prepare the filling.
Peach Pie filling
Now we’ll make the filling.
You will need:
1/2 cup sugar
1/4 cup packed dark brown sugar
6- 6 1/2 cups sliced peeled peaches
1/4 cup cornstarch
1/4 teaspoon ground allspice or nutmeg
1/4 teaspoon ground cinnamon
1/8 teaspoon salt
2 teaspoons lemon juice
1- 2 tablespoons butter
In a bowl, combine sugars; add peaches and toss gently. Cover and let stand for at least 1 hour, or up to overnight in the refrigerator. Drain peaches, reserving juice.
In a small saucepan, combine the cornstarch, allspice or nutmeg, cinnamon and salt; stir in reserved juice. Bring to a boil; cook and stir constantly for a couple of minutes or until thickened. Remove from the heat; stir in lemon juice and butter. Gently stir in peaches.
Pour the filling into the prepared pie crust.Carefully place the smaller half of the crust on top. Trim, seal and flute edges. Prick a few times with a fork. (Or you can make cutouts with small cookie cutters, make a lattice top, anything you like! Get fancy!
Bake at 400° for 50-60 minutes or until crust is golden brown and filling is bubbly.