Have you heard of, or even maybe TRIED, Natto (fermented soybeans)?

When you see it in Japanese or other Asian grocery stores, they come in a package of 3 little white, styrofoam boxes. It is usually served with rice in Japanese meals, most often breakfast. You stir it well to make it super stringy and slimy, add the tiny mustard and soy sauce packets that come with it, and pour everyting over hot rice. Then, you dig in!
It is for sure an acquired taste, even for those who grew up eating Japanese food. You either love it or loathe it. However, with all the fermented food craze lately, I read that it is added to everything, and I even saw it used to top a pizza! Now that is something I have to try! 😋

So, in this post, I will show you how to make this super healthy, fermented food at home. In case you are like me and my mom, who happen to love natto, you can have an unlimited supply if you make it.
You will need an incubator that can keep a constant temperature of 100F. You can use an oven, a proofing box for bread making, yogurt maker, or an Excalibur Dehydrator.
*yogurt makers keep a temperature of about 105-112F and natto fermentation needs a temperature of around 100-105F, which is almost in the same range. I suggest checking the temperature first, if using a yogurt maker.*

A few years ago, I purchased a Japanese Yogurt maker specifically because you can adjust the temperature, unlike the ones available here in the US. The brand is Tanika and it is really a handy little appliance that I always use to make my homemade natto.
Of course, I also have an oven, an Excalibur dehydrator, 3 different kinds of yogurt maker, and a Brod and Taylor Folding Bread Proofer, but I do not like warming up that much space for a little jar of natto.
So, this Tanika yogurt maker is just perfect for me. Labels on the appliance and the manual are in Japanese but I recently saw some on Amazon that are made for the US market with English labels.

Just like yogurt, you need to buy a package first to be able to get the bacteria you need to make natto, then if you make it regularly, you just get a little from the prepared batch to make more. This is the easiest way to get started. Of course, you could also buy some natto spores to start the Bacillus Subtilis culture. Mitoku is the brand I use. It’s from Japan and makes really tasty natto. It comes with a tiny measuring spoon so you get a lot of natto even though the culture bottle is tiny.
Follow me on Facebook: https://www.facebook.com/At-Home-With-Theresa-100255438410727/
Ingredients:
1 1/2 cups soybeans, preferably organic
Water
Store bought natto, or natto spores
Procedure:

1. Rinse 1 1/2 cups of soybeans in water and soak in at least 5 cups of water overnight at room temperature.

*the soybeans will more than double its size, see photo below, so make sure you use a lot of water when soaking the beans.*


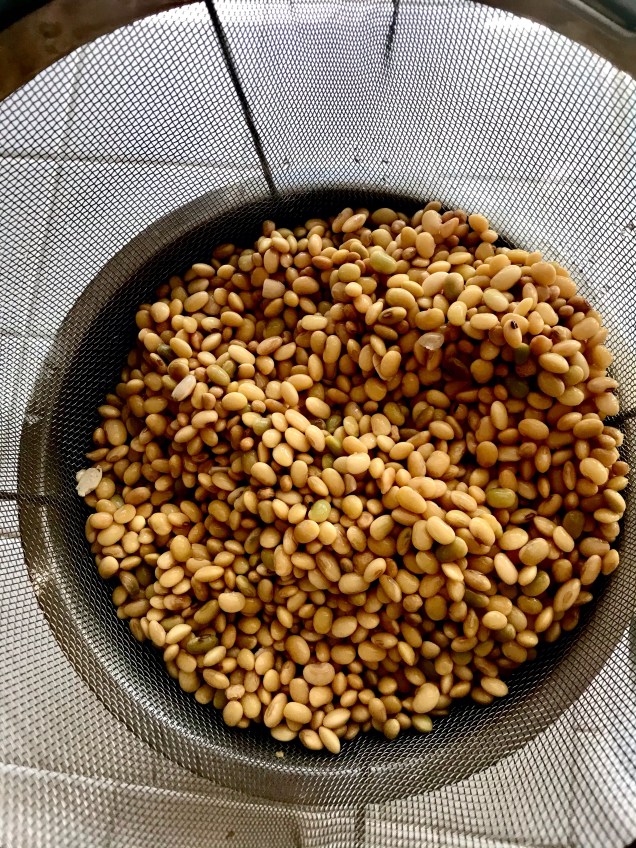
2. Rinse and strain soybeans and place in a metal footed strainer basket (or a colander over a trivet).

3. Pour 1 1/2 cups water in the pressure cooker liner.

4. Place the strainer with soybeans in the pressure cooker and pressure cook for 45 minutes.

5. Let pressure drop for 10 minutes, then release pressure, placing a kitchen towel over the vent to help dissipate the steam.


6. In the meantime, prepare your yogurt maker.

7. Place 1/4 cup of water in the Tanika Yogurt Maker’s inner container, place the spoon inside and cover with the clear cover.

8. Position the spoon so that the handle sticks out of the cut out in the cover.

9. Microwave for 1 minute and 30 seconds to sterilize. Dump out the water.


10. If using the natto spores, mix 2 teaspoons boiled and cooled water with 1 tiny spoonful (included in the spores box) of the culture. Mix well and set aside.


11. Take one soybean and squeeze it between two fingers, it should be soft enough that it will crush easily.

12. Transfer half of the hot soybeans in the prepared yogurt container.

13. A. *If using spores, pour the half of the diluted culture over the hot soybeans.

13. B. If using ready made natto, add a spoonful of it onto the hot soybeans. Stir with the sterilized spoon.

14. A. *Add the rest of the soybeans to the yogurt container and then the rest of the diluted culture, if using spores. Mix well.

14. B. *If using pre made natto, add a spoonful more to the soybeans, then mix throughly.

15. Make sure to mix well, but be careful not to crush the beans.

16. Set the container into the yogurt maker, cover with a clean towel and place the blue cover over, slightly ajar to allow air in.

17. Set the fermentation temperature to 45C and the timer to 24 hours.

18. Carefully remove the blue cover and check the beans after 24 hours.

19. They should have a white, fuzzy growth around most of the beans.

20. Cover with the clear cover then the blue screw, and refrigerate for at least 24 hours before eating.


21. Take a big spoonful of the natto and place on a serving dish. Cover and return the rest to the refrigerator. Using a spoon or chopsticks, thoroughly mix the natto until stringy and slimy. I was told to stir vigorously 100 times! Add a little soy sauce and hot mustard, serve over hot plain rice. Enjoy!
It seems like it takes alot of time to make? How long is the process? 💛
It’s a long process but mostly hands off and you don’t need to watch it. 12 hours soaking overnight, 45 minutes steaming, plus 10 minutes to release pressure, then 24 hours incubation…about a day and a half or so, 37 hours mire or less. 😊
New to a plant based diet (raw), when I graduate to some cooked food. I am going to try it.
I hope you will comment back here when you do! 🙏❤️
Ok!! :))
Interesting directions Theresa concerning the stirring. I made some a couple of weeks ago, from a different website. The fermented beans had the white film all over them, but there was no slime so I thought it was a failure. Maybe stirring it 100 times might have produced some slime. I’m still eating them though as I’m sure there is something good in them and like the flavour.
Hello! Sometimes the white film is very light but try stirring it to see if it develops the sliminess. Smell and taste )if you’re familiar with it) is the only way to see if fermenting projects work. If it tastes off, likely it is and i would suggest discarding it.