I didn’t realize that a lot of people have this Electric Lunchbox. It was an impulse purchase for me because it was so cute! I mean, just look at it! 😍

One thing I know is that it took a little trial and error for me to be comfortable using it. The instructions included were a little vague. But I like challenges, so I dove right in!
Little experiments followed…(something I like to do as I am a scientist by profession) until eggs, soups, curry, and white rice were cooked just the way I like it. Records were kept, timers were used, and after all that, I just had to share it with others so that my findings won’t be in vain. 😊
Here are a few things I learned after tinkering with this lunchbox for a few weeks. Hoping to help others gain confidence in trying their own recipes in it.

1. *Please note that the word “cup” in my electric lunchbox recipes mostly refer to the little itaki cup included with the lunchbox. It holds 40ml.* This cup also has a handy egg piercer right on the bottom of it. Careful – as it is a bit sharp.
**I recently changed this to “uses regular cups, unless stated” since I’ve been making more than just main dishes in it.

2. Have a “prep day”. Set aside an few minutes or so to cut up meats and veggies and bag them individually in little portions. This would be easier done right after purchasing groceries. They can then be stored in the freezer for longer storage or in the refrigerator if you’d use them up soon. Frozen food can be moved to the refrigerator to defrost the night before you need it.

3. White rice always cooks perfectly when I use an equal amount of water in the rice bowl (usually 2:2) and at least 2 cups water in the base. Make sure to rinse the rice and drain before adding the measured water. You don’t have to drain every last drop, it’s quite forgiving.

4. Simmer sauces. There is an abundance of simmer sauces available in the grocery stores right now and most that I had tried were good. Just place your meat, tofu, and/or veggies in the bowl, top with a generous pour of the simmer sauce and you’re good to go! Salsa verde with chicken is great too!
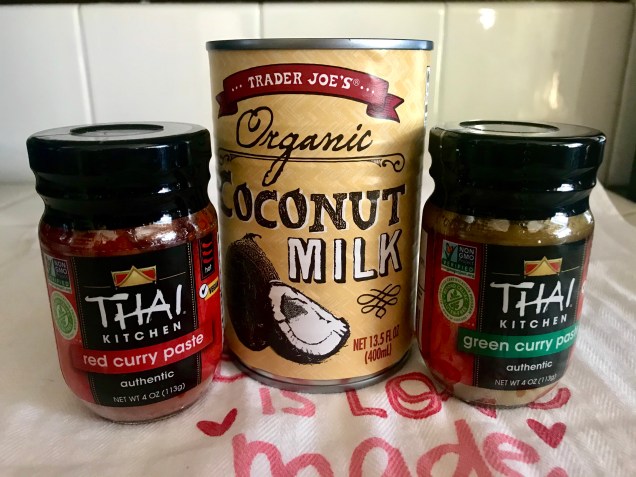
5. Curry pastes and coconut milk. My favorite combo! Top any meat, tofu, and vegetables with a couple of spoonfuls of curry paste and 2-3 little cups coconut milk (basmati rice in top bowl!) and you’ve got yourself a delicious meal! Thai Kitchen brand tastes great!

6. Japanese Curry Mixes. These were the ones I experimented with in the beginning as I am very familiar with it. So easy! Add cut up chicken, pork, or beef in the big bowl. Then diced potatoes, carrots, and onions, one square(cube) of curry mix, 2 little cups of water. Place 2 little cups rice with 2 little cups water in the small bowl. Add 2 little cups water to the base, place big and small bowl in base. Cover and steam until it shuts off. Stir curry and serve over rice. Yummy!!

7. Barbecue sauce. Easy to make barbecue chicken when you have this on hand! Just add diced chicken breasts in the bowl and a good squeeze of barbecue sauce.
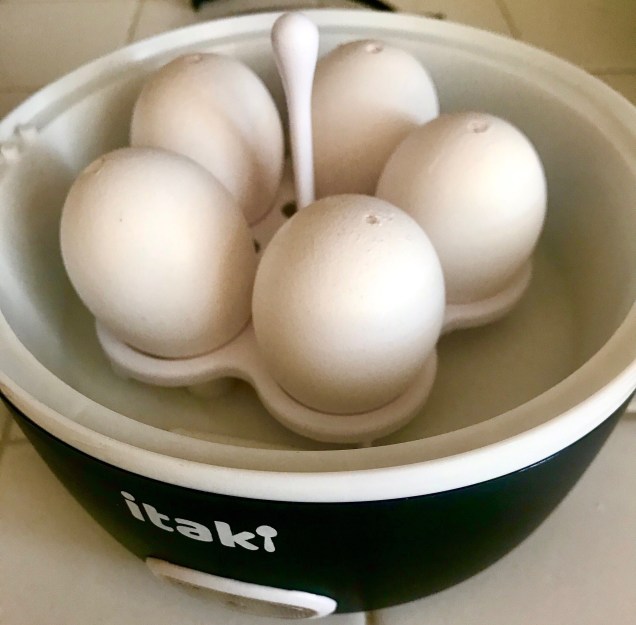
8. Boiled Eggs: I get the perfect hard boiled eggs by piercing the wide end of 5 eggs with the egg piercer (it’s on the bottom of the measuring cup), placing it in the egg holder, pierced side up and onto the base without the stainless bowls. Add 1 little cup water to the base, cover, and let it steam until it shuts off. It will take about 25 minutes. Place eggs in cold water right after cooking.


9. Soft boiled Eggs: Take 5 eggs and pierce the wide end. Place in the egg holder and onto the base without the stainless bowls. Add 25 ml water to the base, cover, and let it steam until it shuts off. Place eggs in cold water right after cooking. This will take about 15-16 minutes. If you want the yolks runnier, use less water which equates to less cooking time.

10. To peel boiled eggs easily: Tap eggs on the counter multiple times then gently roll between your palm and the counter, exerting gentle pressure. It will peel off like the photo above.
11. Scrambled Eggs: Spray the bowl with cooking spray to make sure egg doesn’t stick. Lining with parchment works too! Cover bowl with foil. 1 little cup water in the base will be enough to cook 2 scrambled eggs in the small bowl.
12. Omelets: place diced mushrooms, bell peppers, chopped ham, turkey, cheese, spinach – whatever you use in your omelet – in the bowl that was sprayed with cooking spray. Beat 2 eggs and season with salt and pepper. Pour over everything in the bowl. Cover bowl with foil. 1-2 little cups of water in the bowl will cook the omelet, depending on how much filling was added.
13. DO NOT use the plastic lid for the stainless bowls WHILE steaming. They are perfect for storing your prepped bowls in the fridge, or for transporting the bowls to your workplace but they must be removed before turning the lunchbox on. Also, you can order extra bowls from the website if you need them to prepare meals in advance.

14. To cook small pasta (macaroni, ditalini, small penne, etc.) in soups, add 1-2 little cups pasta and pour in whatever liquid you are using, leaving about an inch between the liquid level and top of the bowl. 2 cups water in the base would be enough to cook the pasta.

15. 1 little cup (40ml) water in the base creates steam that lasts about 25 minutes in MY Itaki Pro. 2 cups is enough to cook rice, and 2-3 cups is enough to cook main dishes with raw meat (cut into small pieces) with rice in the small bowl. So far, I never had to use more than 3 cups except for one instance I’ll explain next. * Please note that I was informed that it varies from 15-25 minutes for others so please check yours out so you can estimate a baseline time per cup and go from there. I will time my cooking and add times to the recipe so you can adjust the amount of water you use in your base.*
16. Try not to open the Electric Lunchbox while it is steaming. I did it once and it took a lot longer to cook the food and I had to add another cup of water.

17. Use a scrubbing pad to remove deposits from the steamer. I had also used Magic Eraser with the same results. I will likely try vinegar soon and update this post.
*So I did try vinegar and here is the best way I found: after your food is cooked and while the steaming element is still HOT, add a little vinegar to it. Let sit for a few seconds and brush with a toothbrush until all the deposits/stains are removed. Rinse thoroughly. It will look brand new! Do not leave the vinegar too long as it may pit the metal.

18. Make sure to empty the base of residual water and let dry before storing. You do not want mold or bacteria growing in there. I just rinse and wipe them and place the base and cover upside down to dry on the counter.
19. If you want to keep condensation out of your food, line the inside of the foil with paper towel, it will absorb condensation and will help keep your food dry. I usually do this for cheesecake, scrambled eggs, or cakes.
I will add to this list as I find more useful tips. In the meantime, I will be trying to find time to cook in it more and share the recipes with you. Keep safe everyone!
Follow me for more recipes for the Itaki!
See Itaki’s offerings here! https://www.itakico.com/theresa
Hi T, this was really insightful! Thanks for sharing your tips. I got one of these a few years ago and haven’t really used it muuh mainly cos I didn’t know how to use it right. Could you give me suggestions on how to cook brown rice in the itaki? Thank you
Hello Grace! Thank you for reading my blog. I truly suggest you play/experiment with your ELB, it’s so much fun. For brown rice, check out this link https://athomewiththeresa.com/2020/12/29/electric-lunchbox-74-other-grains-pearl-barley-and-jobs-tears-adlai/
And to see the ELB recipes, just type “electric Lunchbox“ in the search box.
Thank you again! ❤️🙏
I don’t quite understand this for “scrambled” eggs–11. Scrambled Eggs: Spray the bowl with cooking spray to make sure egg doesn’t stick. Lining with parchment works too! Cover bowl with foil. 1 little cup water in the base will be enough to cook 2 scrambled eggs in the small bowl.
bowl is little bowl or bigger bowl?
cover with foil as in form a lid of sorts? if using the bigger bowl, would the little bowl on top work instead?
Thanks. Your posts help figure out my impulse purchase.
Depends on how many eggs you make you can use the small or big bowl. I usually only use the little nesting bowl for 2 scrambled eggs. Foil is to prevent condensation from dropping on your scrambled eggs and making it watery. If you line the inside of the foil with paper towel, it will absorb condensation and will help your food taste more like scrambled eggs.
I hope it helps! Thank you for visiting! ❤️
I traded sourdough loaves for fresh eggs last year and yes they are harder to peel. Your observation is correct though, if steamed they peel easier. Lucky you you have your own chickens! I’m jealous!
The cooking suggestions are great and I appreciate the time suggestion about the eggs. I never seem to remember how long to steam the eggs to get them hard’ boiled’. I can tell you, because I have chickens my eggs are extremely fresh which most people know makes it almost impossible to peel them and have them not look like badgers peeled them. Since cooking my eggs in my Itaki I have no problems getting the peeled nicely. I know and have always have gently cracked them after removing from the boiling water and putting the into very cold water to cool but often still had problems getting the shell off and leaving the white part looking nice. ) Maybe because they eggs are more gently cooked than boiling in a pot of water it has an affect. Either way, my observation holds true. and I actually have some eggs going right now as I type this… going to make chicken salad for dinner. Thanks again for the recipes, suggestions and great infornation.~ Nan R.
I traded sourdough loaves for fresh eggs last year and yes they are harder to peel. Your observation is correct though, if steamed they peel easier. Lucky you you have your own chickens! I’m jealous!
Thanks for the hard boiled egg tips-been looking how to use the little stand for a while!
I’m glad you found it helpful! Thank you for visiting and I hope you try the recipes! ❤️🙏
Hi Theresa,
I am re-reading your blog again after a lull in cooking with the Itaki. My itaki broke and I bought a new ELB (unknown brand). I want to see your cooking recipes again as when I started cooking pre-COVID, I felt I was at my healthiest. Your blog is something to look forward to and your recipes are simple to follow. I wish you more blessings as you shared many things with us (your readers). Very grateful, Mary
Hello Mary,
You’ll never know how you made my heart so full today! Thank you! Thank you so much for your kind words! I am so happy to have helped..hoping that I’ll find more time to make more recipes. ❤️ let me know if there is anything you’ll want to see sometime in the future. Thank you for the support! Truly appreciate it. ❤️🙏