
I kept seeing the ad for this electric lunchbox on Facebook and other social media sites and it honestly piqued my interest.
I really do not need this lunchbox as I cannot use it at work, but can you see how cute it is? I couldn’t resist buying it (and a shabuki and the jumbo! 🤗). Since it came from overseas, it took a full month to get here. The first shipment got lost so i ordered again through their affiliate, wowzone.

The box for Itaki Pro included the following:
A base – where you put water to steam your food.
A cover – to keep the steam/heat in.
2 stainless steel bowls that nest. Smaller one goes on top of the bigger bowl.
A plastic lid for the bowls. You do NOT use this when steaming.

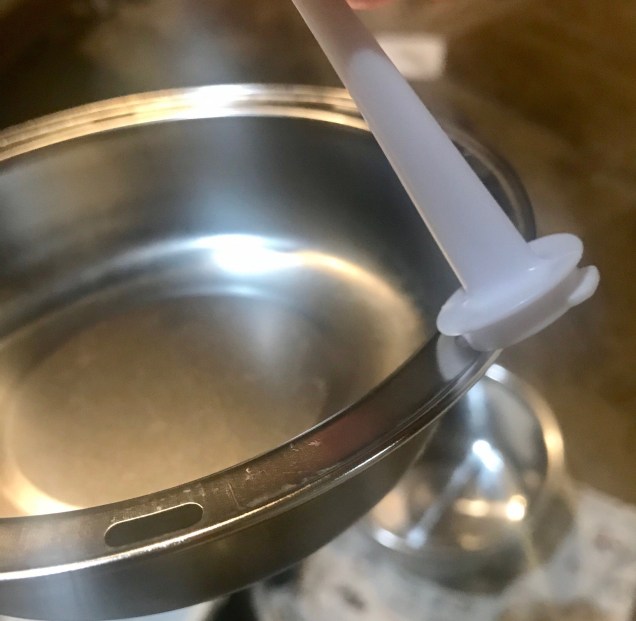
A small measuring cup – 40 ml. This cup also has an egg piercer at the bottom. It is used to carefully pierce the wide end of an egg prior to steaming. This makes the eggs easier to peel and I heard that it reduces the eggy smell too.
Egg holder with a handle – can cook 5 eggs at a time. *The handle can be used to carefully lift the little metal bowl off of the bottom bowl! Make sure it isn’t too heavy as the handle is made of plastic.*

A little recipe guide and an instruction leaflet. The recipe book is also available by email in pdf format, just ask! 😊
A pretty cloth carry bag.
And the plug.

So what does this thing do? It can either cook your meal from scratch or just reheat your food using steam. It comes with a tiny measuring cup that holds 40 ml. One little cup of water in the base unit of MY itaki creates steam for about 25 minutes. (Please note that I was informed that it varies from 15-25 minutes for others so please check yours out so you can estimate a baseline time per cup and go from there. I will time my cooking and add times to the recipe so you can adjust the amount of water you use in your base.) I use 2-3 cups when cooking a full meal with raw meats specially if the bottom bowl is full. After the water has boiled off, the lunchbox automatically shuts off, convenient right? Hands free and fool proof! What’s not to love?
*Please note that the word “cup” in any of my electric lunchbox recipe refers to the little itaki cup included with the lunchbox. It holds 40ml. See photo above.*
The little stainless top bowl usually makes rice for me. I find that 2 little cups of rice, rinsed well, plus 2 little cups of water always yields perfect rice with at least 2 itaki cups water in the base. I had tried it with long grain, Japanese short/medium grain, and basmati rice. 2:2 works wonderfully for all of these. I have yet to try brown rice but will sometime.
I have been so excited waiting for this to arrive that I opened it right away and washed everything. As soon as it was clean, I checked what ingredients I have on hand to put it to the test. I feel like a kid with a new toy!
For my trial recipe I made a beef and radish soup in the bottom bowl and some rice in the top bowl.

2 itaki cups rice, rinsed
2 itaki cups water for rice
A handful of thinly sliced beef
4 inch daikon radish, peeled and cubed
Dash of garlic powder
Minced onion
Green onions
1 1/2-2 tablespoons soy sauce
1 teaspoon fish sauce
1/2 tablespoon Korean red pepper paste (adjust to taste)
1/2 teaspoon Korean chili flakes
Water to cover
2 itaki cups water for base

Place rice in the small top bowl and rinse a few times until water is clear. Drain. Place 2 cups of water in the bowl and set aside.

In the bigger bottom bowl, place beef, radish, garlic powder, onion, green onions, soy sauce, fish sauce, red pepper paste, chili flakes, and just enough water to cover. *adjust spices to your taste.*
Add 2 cups of water in the base of the lunchbox. Gently place the big bowl in then place the small rice bowl on top. Cover, secure the clips, plug the cord, and press the button to start.
Try not to open the lunchbox until the light goes off. 2 cups of water in the base will take about 50 minutes.
When the light goes off, carefully open the clips and lift the handles. Holding the handles, turn the cover AWAY from you as the steam can burn you. You don’t want that to happen as you want to enjoy your hot meal, right? Now use a fork to gently lift the rice bowl from the lunchbox using the holes on the edges of the bowl. Fluff the rice a little. Carefully lift the hot soup out of the base and enjoy!

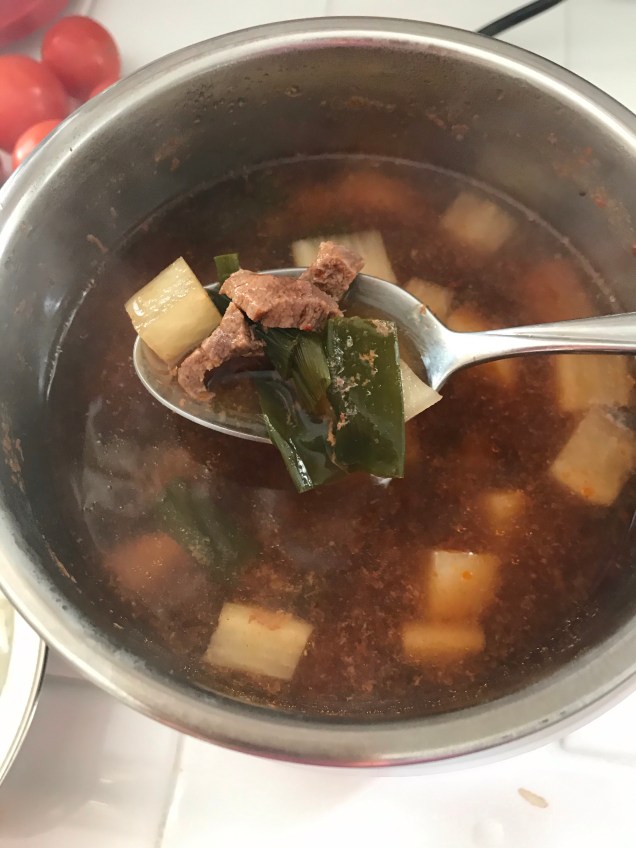
The beef is thinly sliced and perfectly cooked just like the rice. It took about an hour more or less but I am quite impressed as it was really good. Spicy hot and hot. The rice tames it just a little.
Can’t wait till I get more groceries and time to play with this but as of now I can truly see how useful this will be if you’re cooking for one, are traveling, in a dorm, or just want to try out a dish so you’re not stuck with a lot if you didn’t like it. Definitely worth the price and time spent waiting(about a month)!
Follow me for more recipes for the Itaki!
See Itaki’s offerings here! https://www.itakico.com/theresa
Hi. Great reading. I bought one about 6 months ago.
Not used it yet. Have you any more recipe ideas ?
Thank you for your kind words. I am working on more recipes for this but time is never enough. Please check back often. 😊
It came to me today and I can’t wait to try multiple recipes.
Could you send me the manual by email? I didn’t get any
Hello! I do not have any copy of the manual but if you email itaki they will email it to you. Let me see if i can link it here….
https://lookaside.fbsbx.com/file/Itaki%20Recipe%20Book-compressed.pdf?token=AWwyL301mLJCWQDRv6S84jfid0HBNUy36iB4ewrdkQwO2t11RFtMuZw9TuPg_wSX-cSzIBzMFdBSPdZXRDPI4d2St9enB6qtltzKY3keizfXNDgUV66BjVgbJYff2uzaDqvvNsab4ssGfDAZmiyshTvOpxQ7xK9RY6OgiflrqZRoZQUK9RMsYqdyeuMXKemZiZoPpCqWPV8coEVrhjb-Cc9U
https://lookaside.fbsbx.com/file/Itaki%20Pro_Classic%20Pamphlet%20pg%202.pdf?token=AWxNWhtm6BpvRBBOOKus2GGVEkpwpjcsZMY1IjOXTKnVzPcOfXi0myUjThV27f8GSQmcR8-R6wlS3oJbu9WS3RgTuqB13Wc6Ve_q7SC_y2N28SHhhyHJgOrCoiaRh1qULPBy00eXP2l-Vdp6SsimTbifaG0Kz3hfHfLGUceSC9MK2zpTnGR_2m5kXuf16IvSiu1sAymNXVJ70iSG4kXR7Ykn
Let me know if you are able to view it!
I made the soup today because I love daikon, and it came out soooooooo good! Thank you for sharing the recipe!
Oh I’m so glad you liked it! Thank you for the feedback! ❤️🙏
Hi there, I’m wondering if the inside of the plastic shell gets hot when cooking? Is the top of the box just plastic?
Hello! It’s steaming in the lunchbox so yes it does get hot. The bowls of the Itaki are stainless, and you don’t use the bowl cover when cooking. I sometimes use foil, to prevent condensation from making my food too wet or soggy.
Thanks for answering! I love the concept but don’t like heating up plastic, even if BPA-free.
The food isn’t in the plastic if that helps. The food cooks in stainless bowls. 😊
Hi can you do spuds and veg in top together and meat in bottom please
Hello! I think it totally depends in the veggies you’ll include. Potatoes and meat take a bit longer to cook than most veggies, even when cut into small pieces. If I’d try it, I would cook the potatoes and meat first using about 80-120 ml water(2-3 little cups), check if it’s almost done, then add the veggie and steam for another 10 minutes or so, using about 20 – 40 ml of water until veggies are cooked through.
Hope I helped! And thank you for stopping by, I really appreciate it!